


Outriggers
By Peter Pakula
This article deals mainly with effective methods of separating multiple lures and trolled baits in a pattern both vertically and horizontally. Not only does this system result in a wider spread but also offers the ability to enhance a lure or bait presentation by using outriggers to enhance their action.
The concept of outriggers shouldn't be overcomplicated, they are merely a tool that enables both vertical and horizontal separation of lure or bait presentations using release mechanisms that are variable and often adjustable.
The advantages of outriggers are
Outriggers get lures/baits outside the boat's wash into clear water, increasing the spread of lures/baits, allowing more lures/baits to be trolled and cover more area of water.
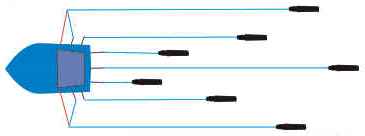
Due to the height of the outriggers, the increase in the angle gets lures/baits to work 'harder' if they are run in close to the transom, and also work harder if they are put further back. For example, in the sketch below the lure off the outrigger is at the same angle to the water as the flat line.
Outriggers minimise tangling as the rigger lines are higher and further back so that the flat lines can easily run under the rigger lines, and due to the wider spread, there is less chance of tangling in turns or in windy conditions.
There are two main systems used
1: Light Release, Drop Back System
Many anglers prefer using a drop back when using lures/baits and baits and in many cases when using baits the outriggers are used to control the amount of drop back via the use of clips, pegs and rubber bands there may be added line fed behind the boat to increase length of the drop back as shown below. In these systems the release is as light as possible, only just enough to hold the lure or bait in position. The system, in theory, allows the fish time to turn and swallow the bait before any pressure is applied to hook the fish.

2: Direct Release
The system involves applying hook-up pressure as soon as possible. Outriggers can have a major drawback. On a strike, you can end up with an awful lot of slack line which might be enough to allow the fish to spit the lure. To help eliminate this problem, taglines have been developed and commonly used with lures. A tagline is merely a length of solid line one end of which is attached to the outrigger running line. The other end is attached to the trolling line via some form of release mechanism, usually a rubber band.
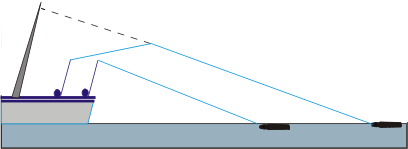
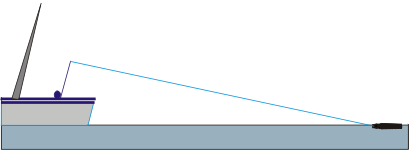
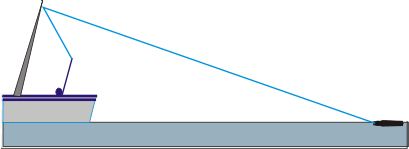
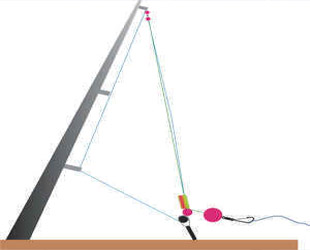
The sketch below shows a lure being trolled off a flat line behind the boat at say 150 feet. On the strike, there is no slack line.
Below shows the lure still at 150 feet behind the boat, but now the line goes through the outrigger. It now takes 186 feet of line to put the lure in this same position. When a fish takes the lure, the line comes out of the outrigger and for some time, there is 36 feet of slack line which may give the fish time to drop the lure. When a fish takes the lure in its mouth the pressure the fish exerts on the lure and the roughness of its jaw make pulling the lure and the hooks through its mouth to hook the fish is unlikely. The fish is generally hooked when it first opens its mouth allowing the lure/bait and hooks to slide enough to hook the fish. If this happens when there is no pressure on the line the hooks may well not hit their target.
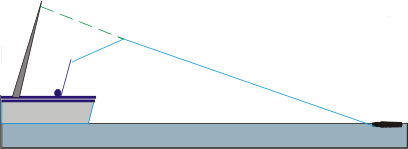
The solution is the tagline as shown below. A tagline is merely a length of solid line one end of which is attached to the outrigger running line. The other end is attached to the trolling line via some form of the release mechanism, usually a rubber band. The lure is once again 148 feet behind the boat, but the same position as the lure that went through the outrigger before, but it now needs only 152 feet of line, thus giving only 4 feet of slack line on the strike. Note that the longer the tagline the less drop back, but the greater the chance of tangles when the boat turns and the more chance of line twisting around the release mechanisms as explained further on. Note that measurements vary on outrigger position, height and length. It's easy enough to do the exercise on the set up you are using.
Setting up the Tag Line
The tagline is connected to the running line of the outrigger, or directly to the outrigger. The tagline should be quite strong, at least twice the breaking strain of the line class used, in most cases nylon around 300lb is used, though when trolling small lures lighter ones that will not sag may be preferable i.e. when using light tackle 100lb taglines are sufficient.
The length of the tagline is not critical, but it should be long enough to reach the tip of the rod you are going to attach the line to. As mentioned earlier the longer the tagline the less drop back, though the longer they are the more problems come into play. A practical length is the distance from the tip of the outrigger to the middle of the transom of the boat. This allows the tagline to be used on any rod on that side of the boat.
To make life easier, we incorporate a tagline 'return' into the rigging of the tagline. When the tagline connected to the trolling line is let out, the return rides up the outrigger halyard as the tagline takes up the weight of the lure. After a strike, the return slides down the running line automatically pulling in the tagline. The danger of not using a return is that after a strike the tagline is free to whip all over the place with the risk of tangling in the fishing lines and to pull in the tagline by pulling down the running line takes time and effort. The tagline return simply eliminates these problems.
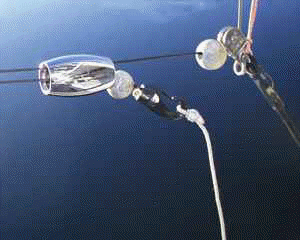
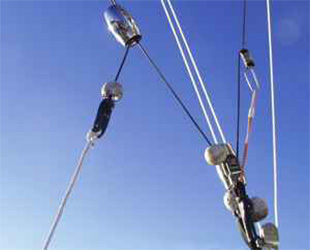
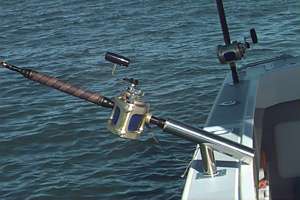
A return is merely something relatively heavy with a hole in the middle through which you thread both the running line and tagline A 2" inch length of brass with a 3/8 inch hole up the middle is ideal. Round off sharp edges to minimise wear on the cords. Ready made ones such as the chrome one pictured are readily available. Many other items such as multiple glass or stainless rings can also be used. Note should be taken that standard returns may be too heavy for light lures to pull up. The system is based on gravity, the higher the angle of the rigger the more effective the returns will be. If the riggers are straight out at 180 degrees to the boat returns may not be effective. The greater the height and higher up the outriggers the better they work.
To increase the effectiveness of the return use silicone grease or oil on the nylon halyards to make them slippery.
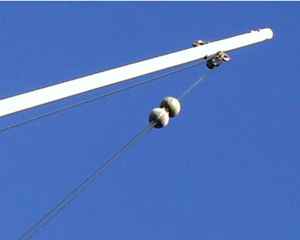
You may have noticed small balls incorporated in outrigger and tagline rigging. They are made from cork, styrene foam or large wooden beads. Essentially these balls are to stop things jamming, pulling through and for protection as follows:
- Between the rigging and tip of the rigger to stop the rigging getting jammed in the tip.
- Beneath the join of the tagline to the outrigger, halyards to stop the return jamming.
- On the end of the tagline, both to stop the tagline slipping through the return and often a large styrene one is used to slow down the recoil of the tagline after a strike. The distance of the ball from the tip of the outrigger should be at least the length of the outrigger to allow the return to slide all the way down.
- At the bottom of the outrigger, halyard to stop the return getting scratched on or damaging the pulley through which the outrigger halyard passes.

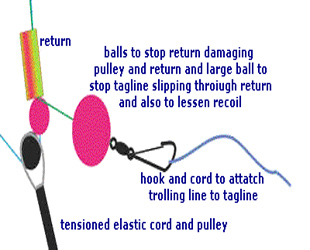
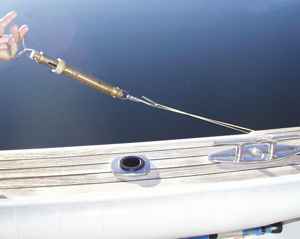
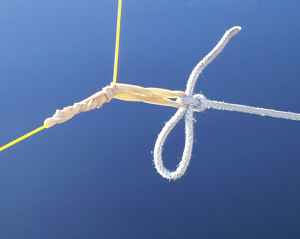
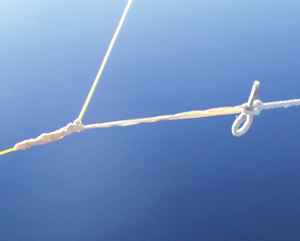
There are many ways to connect the tagline to the trolling line including clips, snaps and pegs of all sorts. Perhaps the easiest is simply as pictured a length of cord that is connected via a slip knot to a rubber band that is wrapped around the trolling line. Instructions as follows:
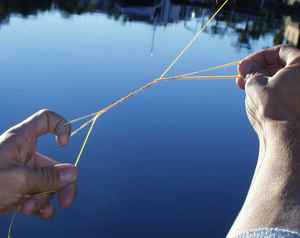
It is very important to check the breaking strain of the bands before you use them. Their strength and elasticity vary from brand to brand, batch to batch and exposure to salt and sun will also affect them. Even very thin bands may have a very high breaking strain. Best to check the breaking strain of the bands with a set of spring scales before using them by pulling the scales slowly.
You'll be surprised at how strong they are. Note that if you check a band with one end looped over the scales and the other over a cleat and say it breaks at 3kg, then when you put the band on the line and bring both ends back to the tagline it will be two ends at 3kg equaling 6kg. Note that you can have just one end going back to the line in which case the setting would be 3kg.
It's advisable to have a good selection of band lengths and widths so that you can choose the appropriate size to give you the release you wish. I prefer the bands to break at around my strike setting. If you use adjustable clips you should also check their release pressures.
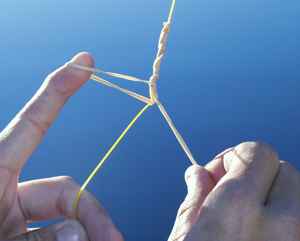
To attach the trolling line to the tagline stretch the band and wind it around the trolling line at least eight times, more of possible, can't have too many.
Next, wind one end back over the other and pass the end of the tagline through both loops of the rubber band if you want double the breaking strain or pass one end of the band through the other and attach only one end to the tagline. Note that if both ends go to the tagline the band will come away on strike if only one end comes back to the tagline the broken band will most likely remain on the line after the strike.
To finish off, simply tie a looped slip knot (as in tying shoelaces). To release the line, you simply pull the tag end and the tagline is free with minimal fumbling with clips or snaps, no fumbling trying to undo tightly twisted bands, or clips while the crew are screaming to get the lines in to go off after a fish on a screaming run.

Tagline and Outrigger pointers
- If a rubber band is used it must be wound tightly and with enough turns so that the line cannot slip through it (friction on nylon should be avoided at all costs).
- Let enough line out between the rod and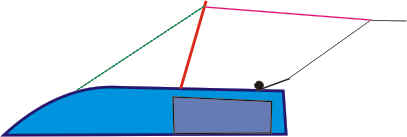 tagline to allow the tagline to run in line with the lure.
- Keep an eye on the end of the tagline in case the line twists around it. The longer the tagline, the more chance of this twist occurring.
- When the boat turns, it creates a belly of line, so make sure it doesn't foul on a rod tip or anything else. - Ensure that the rubber band breaks before any pressure comes on the trolling outfit, as this may well cause bust-offs. One way of ensuring a direct release if you don't have very stiff outriggers is run a stay from the tip of the outrigger to as far forward on the boat as practical as shown in the sketch below.
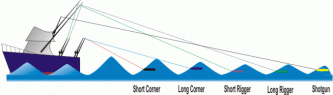
Outriggers should not just be seen as a way of separating lures in width but also in height. There are many set-ups where an outrigger is mounted on the cabin or bridge where a line (called the shot-gun or whiskey line) is run high and back behind the rest of the lure pattern. Many set-ups use multiple taglines 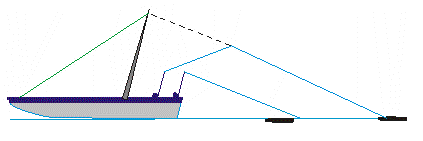 of the same riggers to add height to corner lures or baits and or run teaser lines.
There are a huge variety of bases, holders and boat configurations. Though quite small boats can be equipped with outriggers they may create problems, since there is more crew work required when a strike occurs there often isn't enough room to move comfortably or safely, (or a big enough crew) for this purpose. In these instances simply using angled rod holders either off the centre console, T'top rocket launcher, on a sturdy fibreglass or aluminium roof or on cabin sides can work quite effectively. There are many points in the following that can be incorporated in these simple systems.
 |
 |
 |
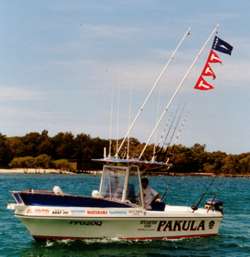
Of course if for no other reason outriggers are great for flying those little red flags on the way home.
![]()