


01: The Aussie Plait
Between The Lines - Ch 03: Connections
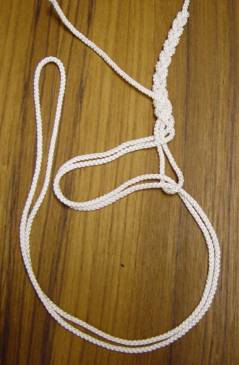
The ‘double’ is formed by doubling a length of line at the end of the main line, in most game and sportfishing situations a snap swivel is tied to the end as an easy connection device to attach leaders with hooks or lures. In some situations, doubles may be tied directly to leaders or hooks.
Doubles have a maximum length according to the rules of IGFA and other associations’ regulations. The lengths vary according to line class. The reason there is a ruling on a double’s length is that it greatly increases the angler's effectiveness as it puts extra pressure on a fish once it is within grasp. Note also under the rules only the angler can touch the line or double during the fight.
The main consideration in tying a double is to use a method that weakens the line as little as possible and is easy to tie under varying circumstances, such as a pitching deck. There are many acceptable methods, one of which is the plait, also known as the Aussie Braid or Aussie Plait. The advantages are it is very quick to tie. You don't need anyone else to help you tie a lengthy double, and when tied properly, it doesn't weaken the line. As with all knots and many other aspects of the technical side of fishing, it is important to practice off the water so you can function better on it
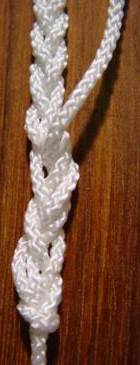
Tying the Aussie Plait
1 - Measure out the length of the double you want to end up with. A 15 foot double would need 30 feet of line. Add another 2 feet to use as the tag or loose end.
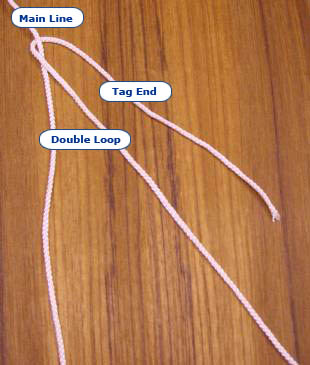
2 - To start the double, loop the tag end over the main line.
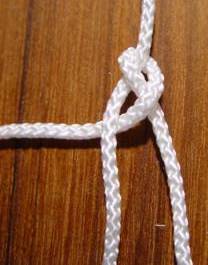
3 - Then feed the tag end between the strands of the double loop. You now have three ends to work with.
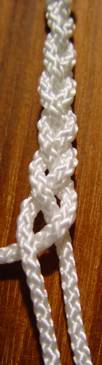
4 - Moving the right-hand loop strand to the left go over the first line and then under the tag end. The next step is plaiting the left-hand strand to the right. Continue the plait by bringing the top outside line through the centre lines by going over the first line then under the next as illustrated. The length of the plait is not important. 1.5 inches on most line classes is enough.
It is quite important that the plait is tight. The pressure exerted by pulling the lines down tightens it to some extent. It is easier to tighten it by simply jerking the ends up as shown in the video clips. Until you get used to doing the plait don't worry too much about how tight it is.
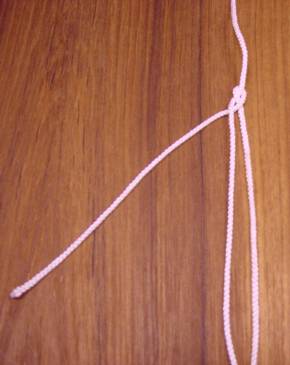
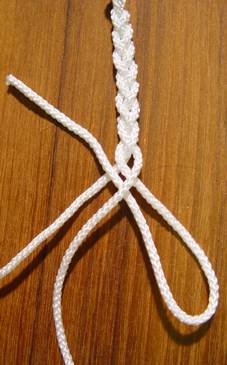
5 - To end the plait simply form a loop in the tag end and continue to plait for another three cycles. It is important that the loop is formed when the tag end is in the middle as shown.
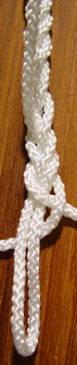
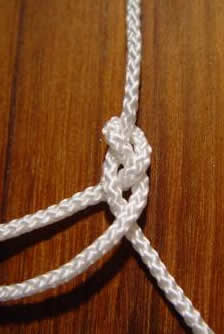
9 - Pull the tag end up until the loop snugs up. Moisten it before you pull it up to lubricate the ends. Do not pull too tight as you'll bunch up the plait.
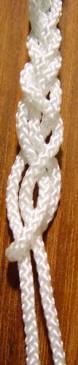
10 - Trim the tag end close to the plait as shown.

Practice the plait until you are confident in its strength, get it as tight as possible, even try breaking it through the rod. Once you are happy and confident with it, use it!
There are many ways of tying and finishing various knots such as the plait. Shown is another method of ending a plait used on heavy line classes such as 37kg and 60kg. Continue the splice up the plait, up to around halfway, pulling the tag end tight each time it is inserted. Other methods of ending the plait include using a series of half hitches or binding the tag end back up the plait using wax thread.
![]()